
If the exhaust on your SE475 engine is damaged, loose or excessively corroded, it should be replaced to ensure the engine operates safely and efficiently. This guide explains how to remove the old exhaust assembly and fit a replacement.
Quick Answer
To replace the exhaust on an SE475 engine:
- Remove the two 10mm exhaust retaining nuts.
- Remove the exhaust cover.
- Lift off the exhaust assembly.
- Check the exhaust heat gasket is correctly positioned.
- Fit the new exhaust assembly.
- Refit the exhaust cover and tighten the retaining nuts securely.
- Check the exhaust is firmly fitted before starting the engine.
Before You Begin
Before carrying out this repair:
- Switch off the engine and allow it to cool completely.
- Remove the spark plug cap to prevent accidental starting.
- Wear suitable personal protective equipment (PPE), including protective gloves.
- Place the machine on a stable, level surface.
Tools required:
- 10mm spanner or socket wrench
Do not work on the exhaust while it is hot, as it can cause serious burns.
Steps
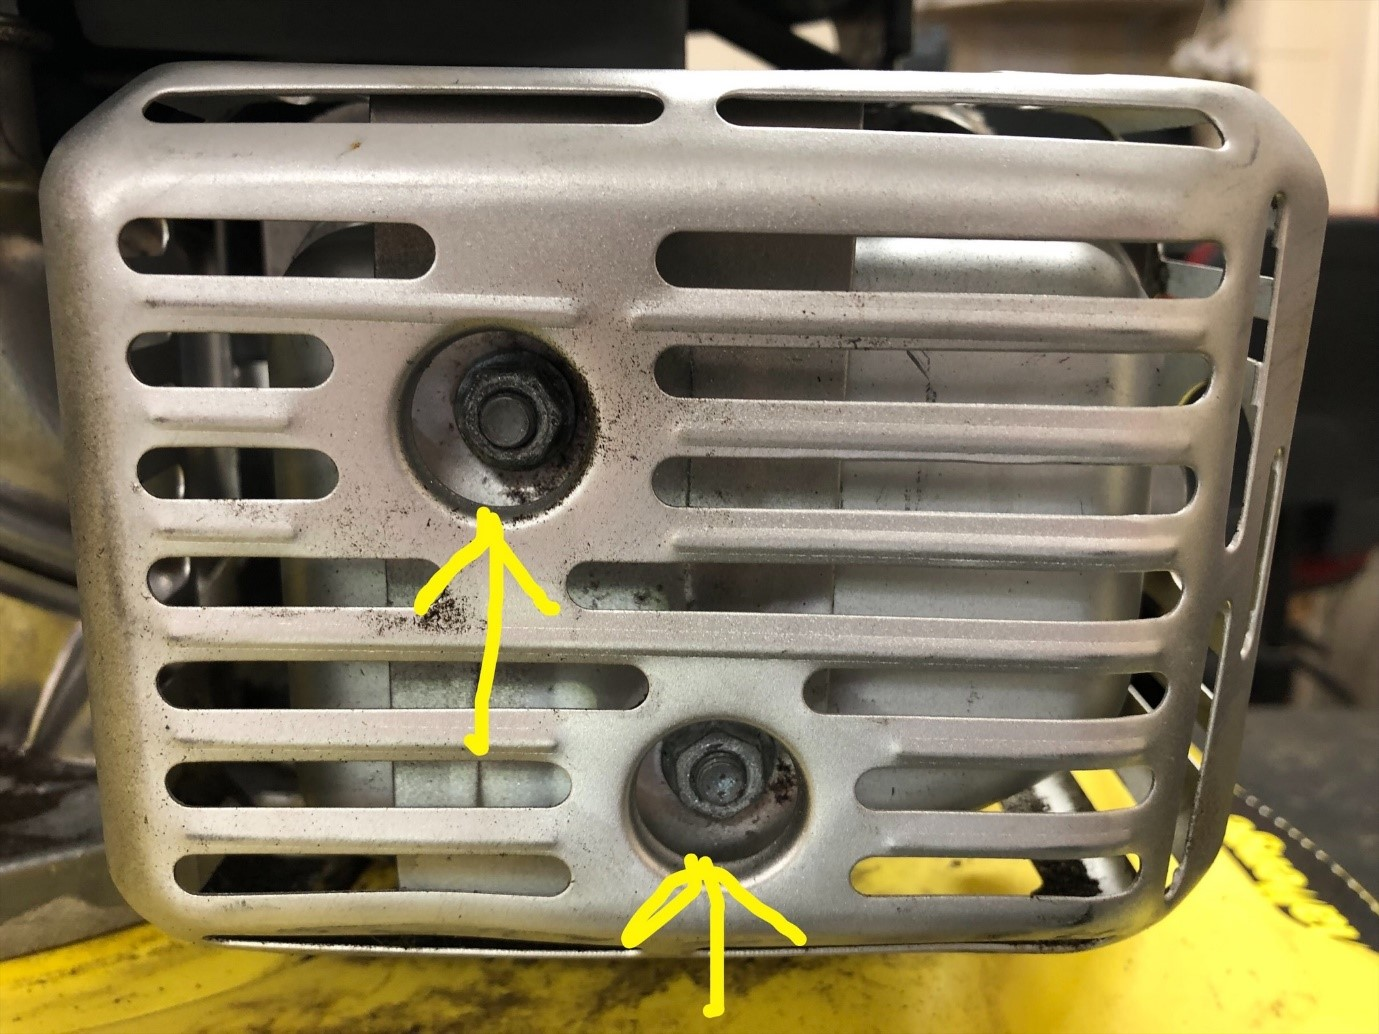
Step 1 – Remove the Exhaust Retaining Nuts
Locate the two 10mm nuts securing the exhaust assembly to the engine.
Using a 10mm spanner or socket wrench:
- Remove both retaining nuts.
- Keep the nuts in a safe place for reassembly.
Step 2 – Remove the Exhaust Cover
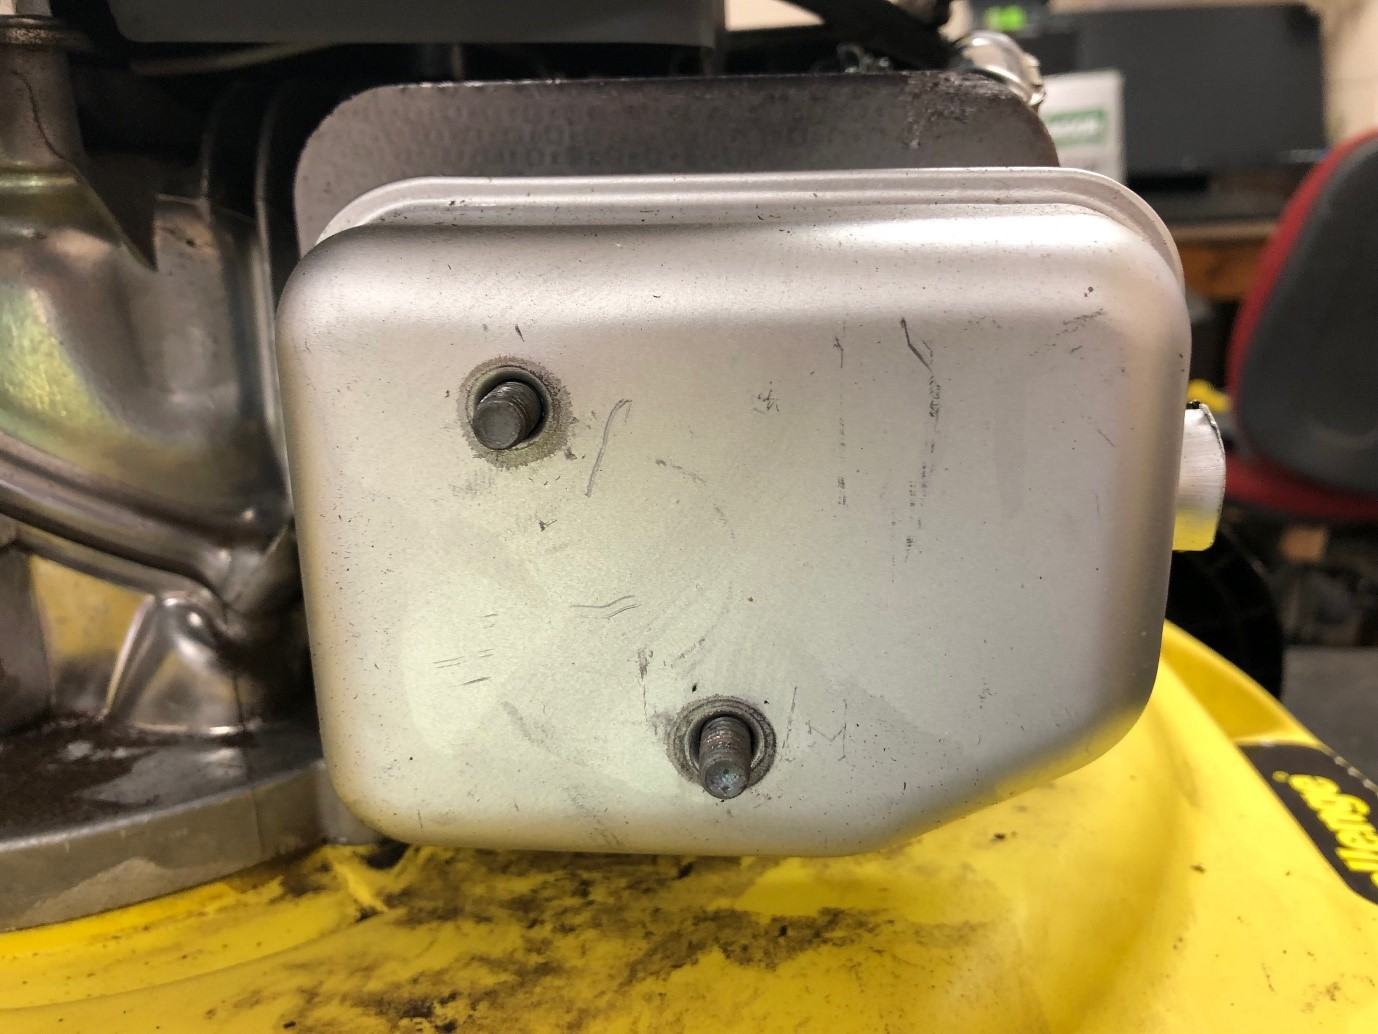
Once the retaining nuts have been removed:
- Carefully lift off the exhaust cover.
- Place it safely to one side.
Take care not to damage the cover or lose any components during removal.
Step 3 – Remove the Exhaust Assembly
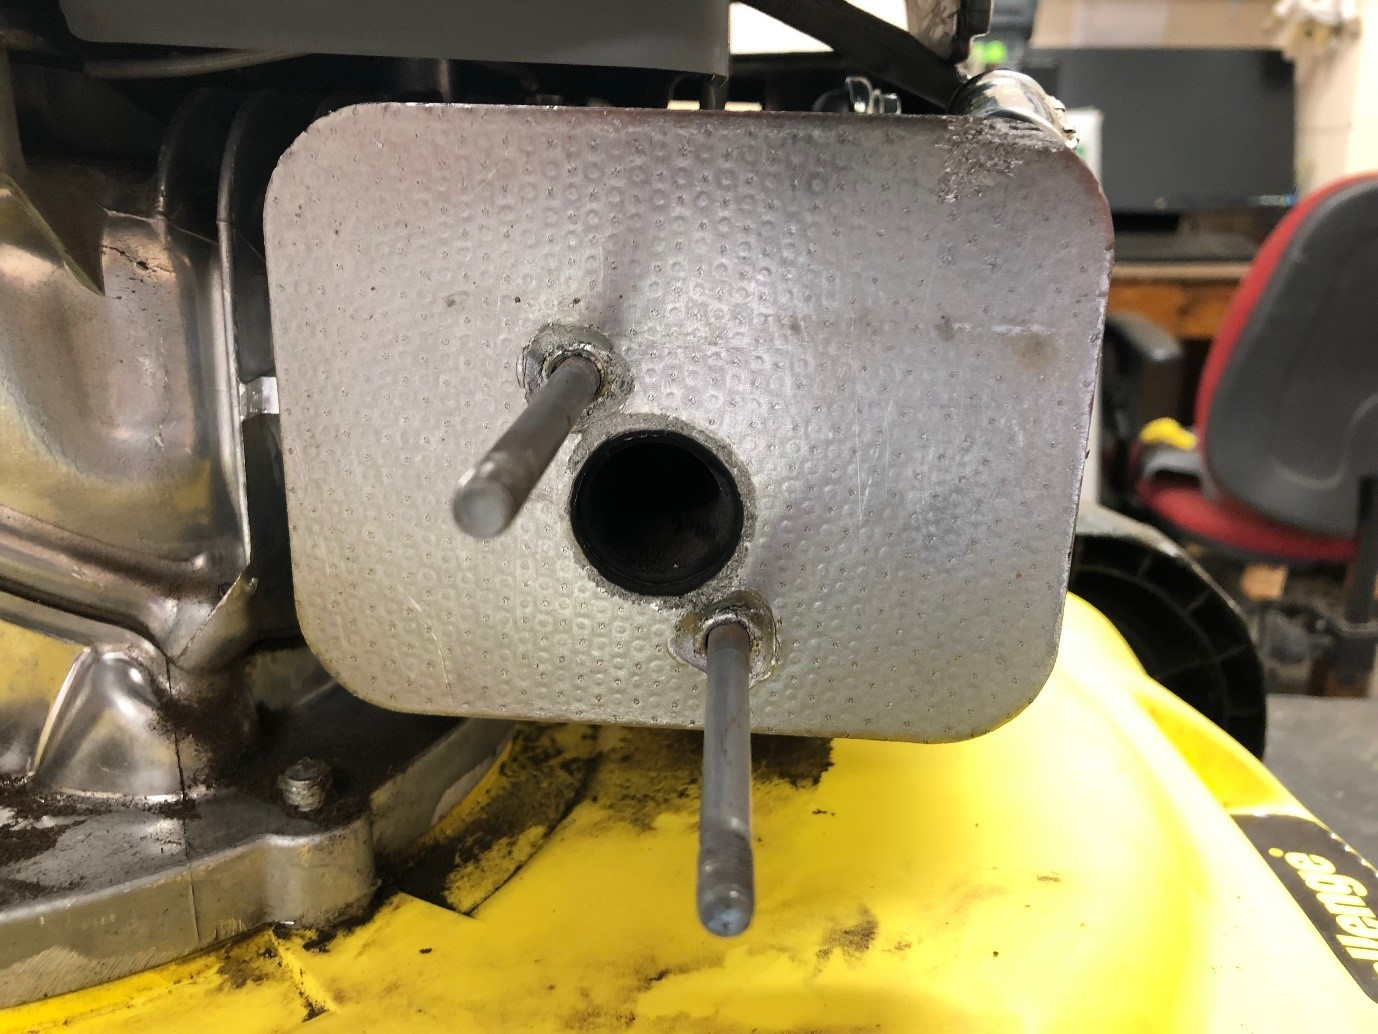
Carefully pull the exhaust assembly away from the engine.
Remove it completely and inspect the mounting area for dirt, damage or signs of gasket failure.
Step 4 – Fit the New Exhaust Assembly
Before installing the replacement exhaust:
- Check that the exhaust heat gasket is present.
- Ensure the gasket is correctly positioned and is not damaged.
Position the new exhaust assembly onto the engine, ensuring it aligns correctly with the mounting studs.
Step 5 – Refit the Exhaust Cover
Place the exhaust cover back into its original position.
Ensure the mounting holes align correctly with the exhaust studs.
Step 6 – Secure the Exhaust
Refit the two 10mm retaining nuts.
Tighten them evenly until the exhaust assembly is secure.
Do not overtighten the nuts, but ensure there is no movement in the exhaust assembly.
Frequently Asked Questions
Why would I need to replace the exhaust?
The exhaust may require replacement if it has become damaged, corroded, cracked or loose, or if excessive exhaust noise or leaks are present.
Can I reuse the exhaust heat gasket?
If the gasket is in good condition and undamaged, it may be reused. However, if it is worn, damaged or leaking, it should be replaced.
Why is the exhaust cover important?
The exhaust cover helps shield the hot exhaust components and should always be refitted before operating the engine.
Can I start the engine without the exhaust fitted?
No. The engine should never be operated without the exhaust assembly correctly installed.